Remember When Restorations-
Anatomy of a Restoration
1937-39 21” Wyandotte Coast to Coast Bus
This one was a basket case disguised in several coats of paint & poorly applied body filler. Most of the pieces I receive are not this bad, but the following
demonstrates [some] of what it takes to bring one back that most of us would throw away & chalk up to a bad purchase.
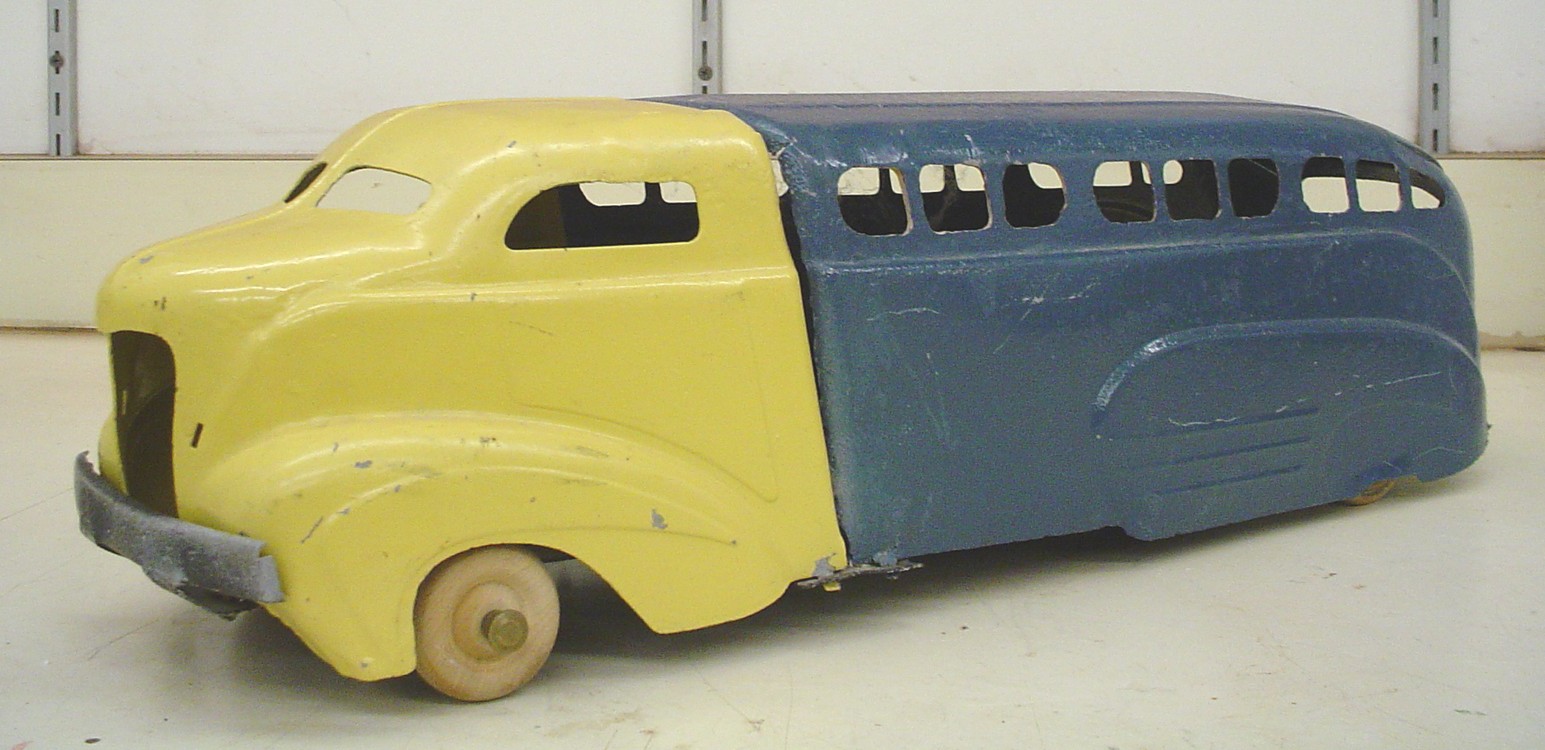
| Picture 1 - shows the “before” bus. Doesn’t look too bad, right? We realize the grille & rear door are missing as well as incorrect wheels & axles. The decals were painted over, but all these items can be replaced with correct original style reproduction parts. |
|
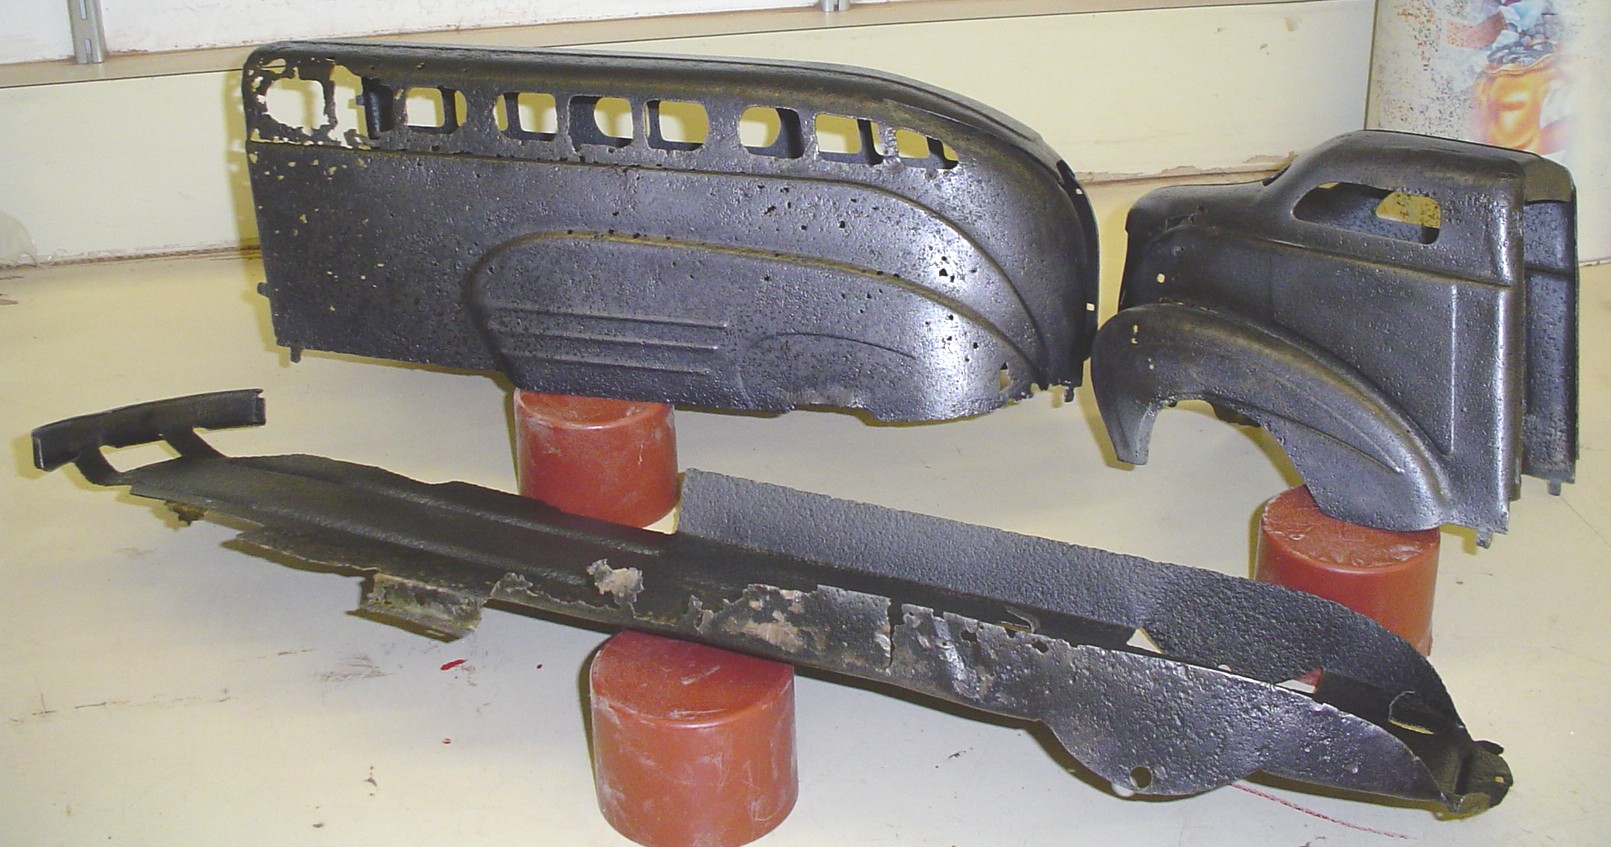
| Picture 2 – the bus has been taken apart & we begin to see some problems. |
|
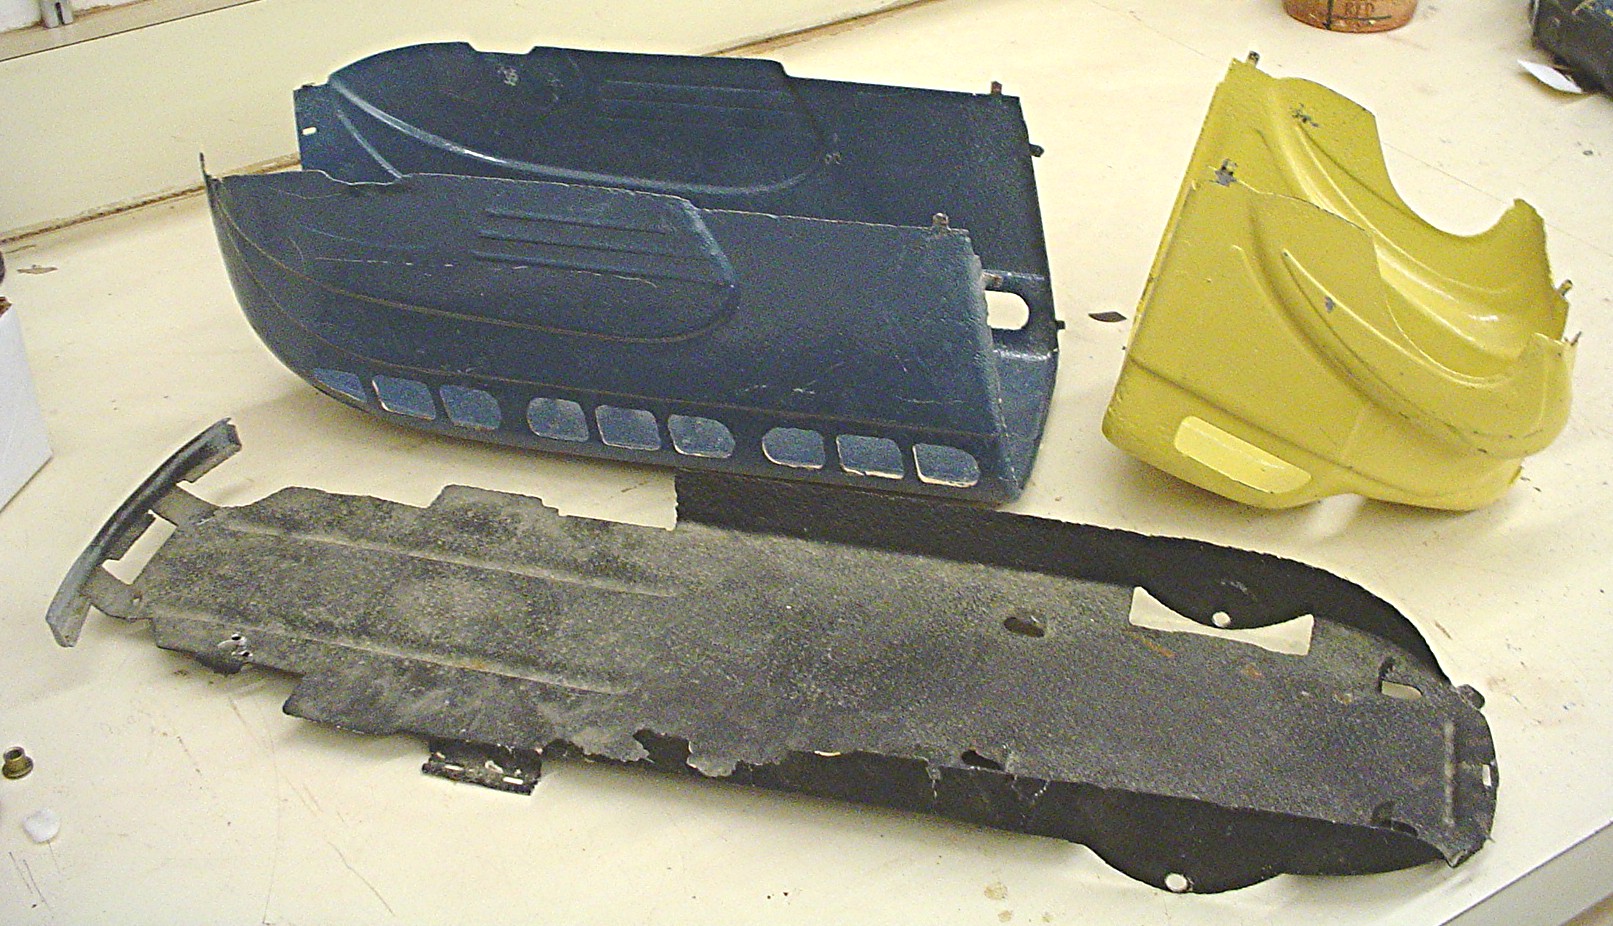
| Picture 3 – here are the parts after sandblasting. The poorly applied bodyfiller has been knocked out by the sandblasting & we now see evidence of extreme pitting caused by years of rust & neglect. |
|
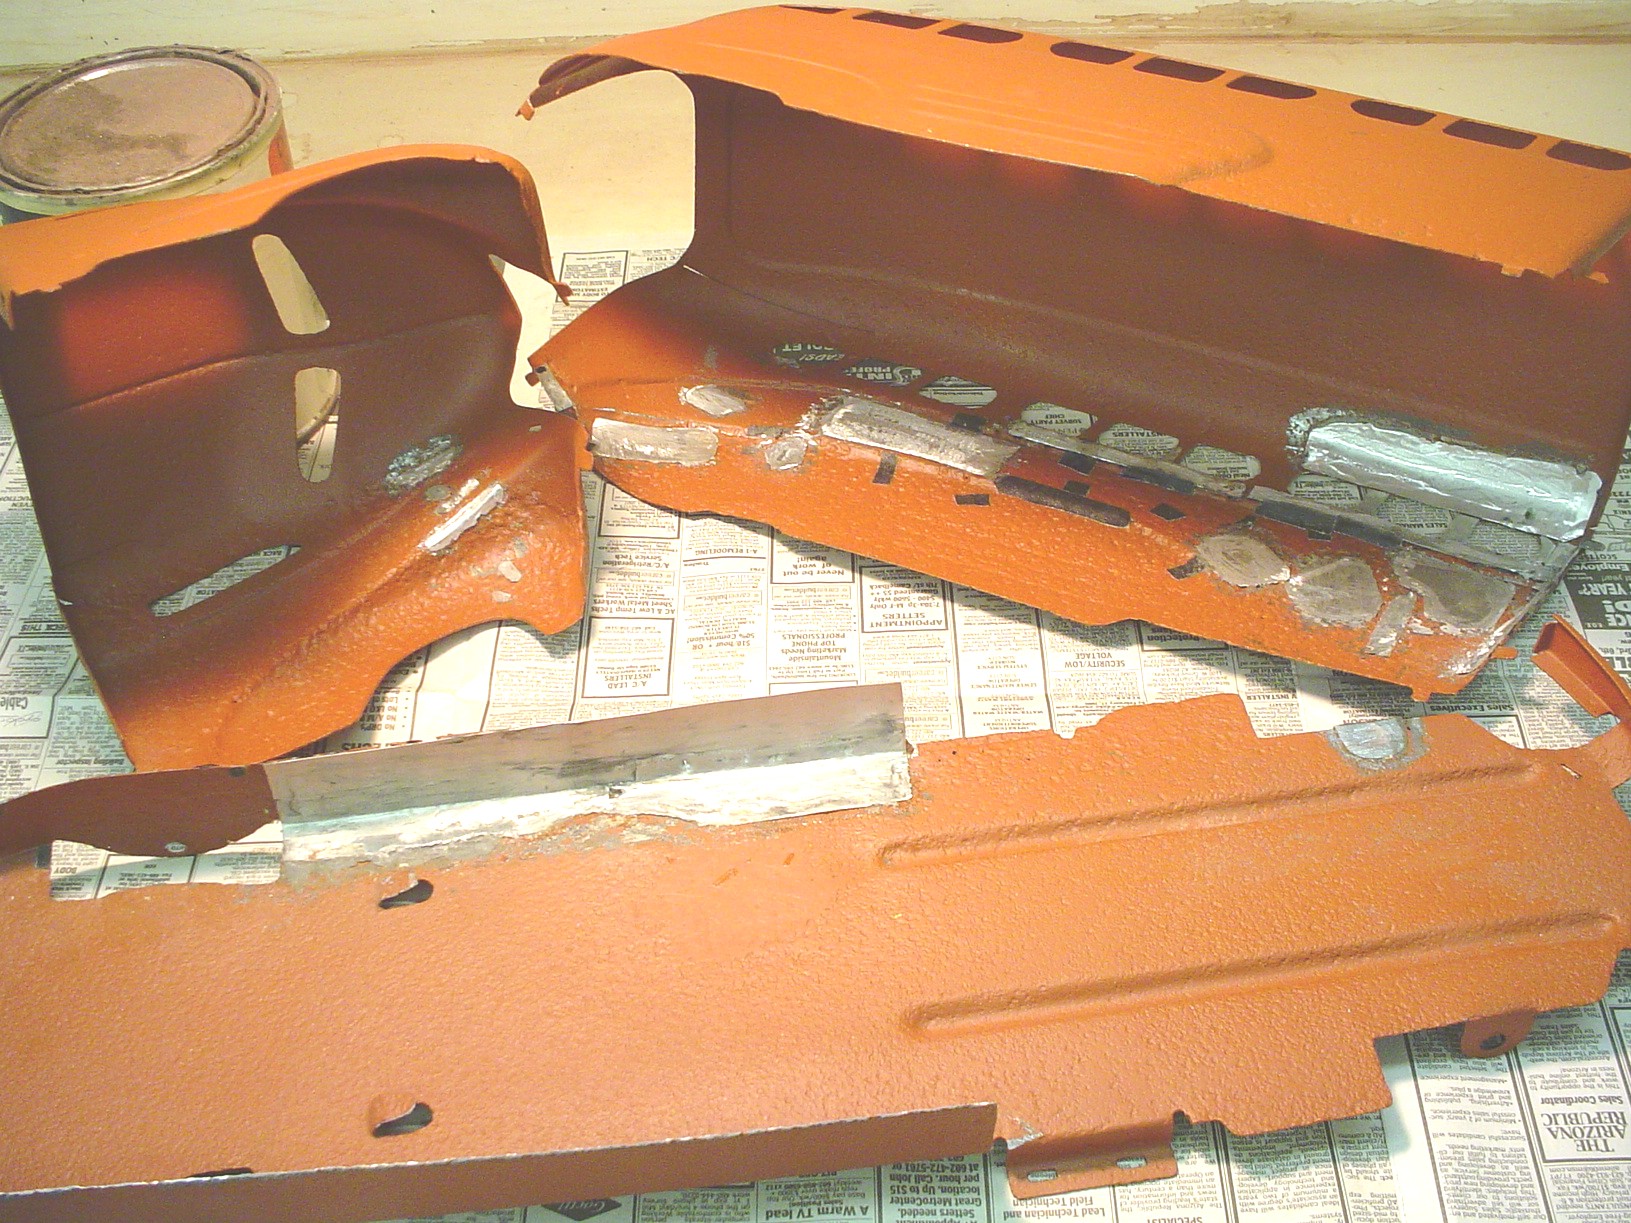
| Picture 4 – a rust inhibitor is applied & eats away additional weak areas. The parts now look as though they have been shot with a shotgun. |
 |
| Picture 5 – first step in repair process – after several coats of primer, pieces of new metal are cut to size & bonded to the inside of the bus cabin to fill all rust holes. Edges are tapered to accept first round of heavy bodyfiller. Window openings begin to take their original shape via dremel tool attachments & hand filing. |
 |
| Picture 6 – heavy bodyfiller is applied & hand sanded to cover new metal patches. |
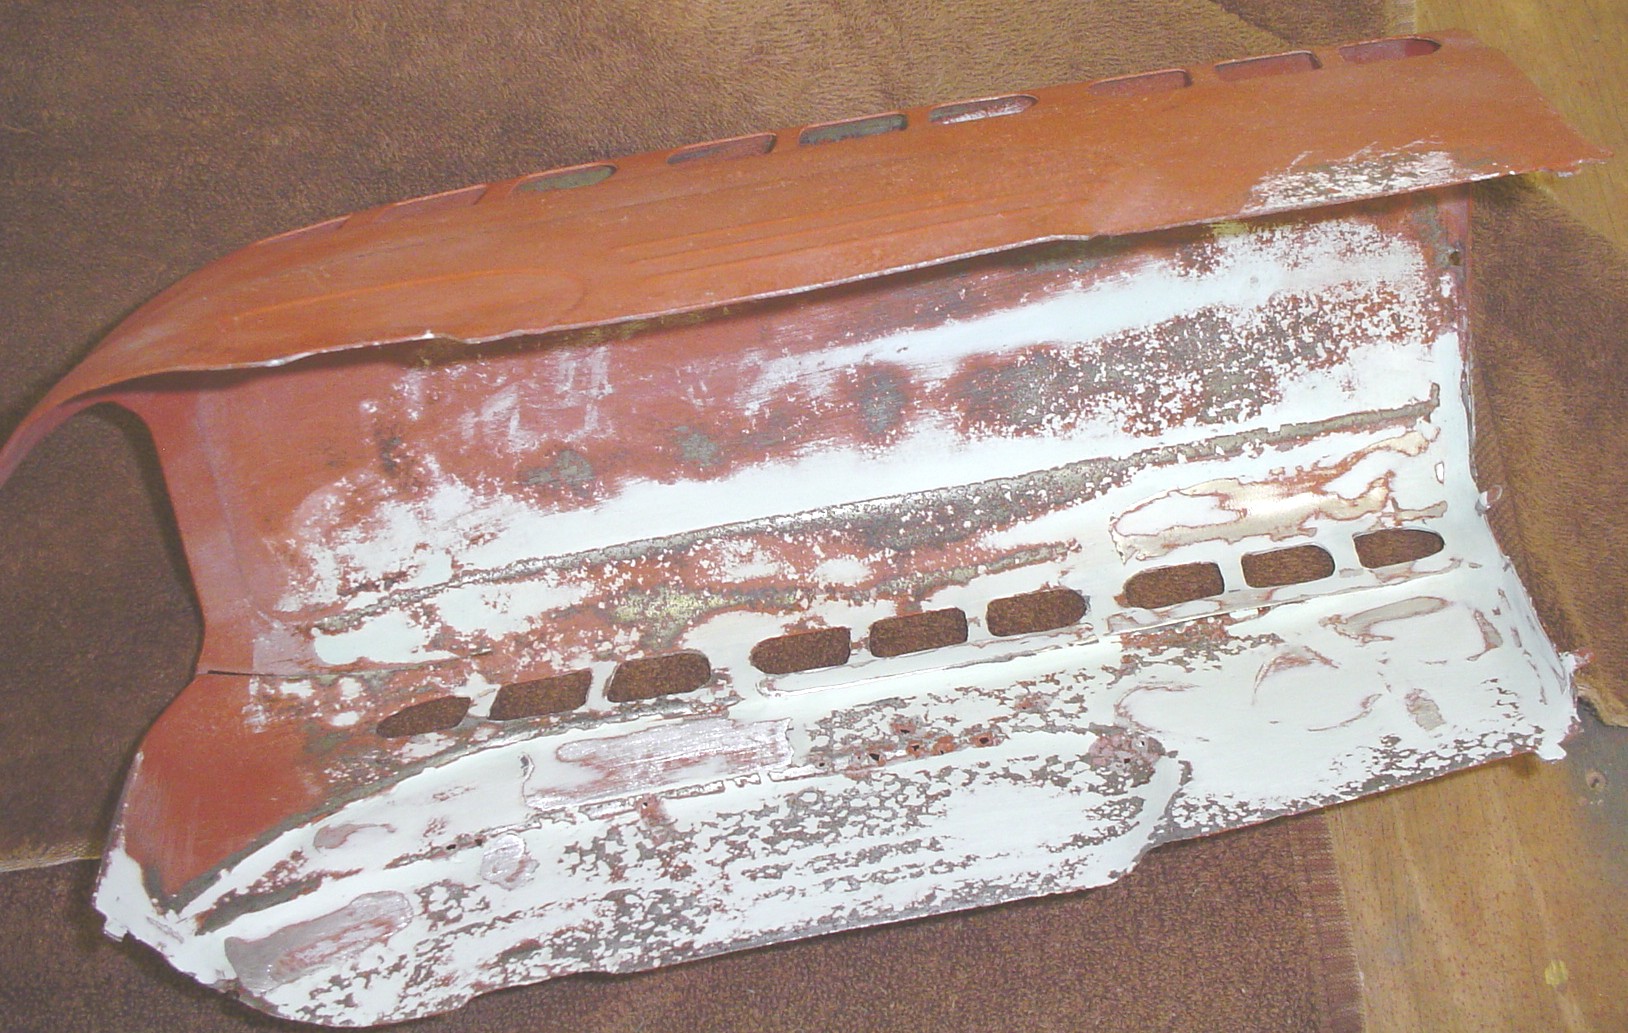 |
| Picture 7 - lighter coats of bodyfiller have been applied & sanded to a smooth finish |
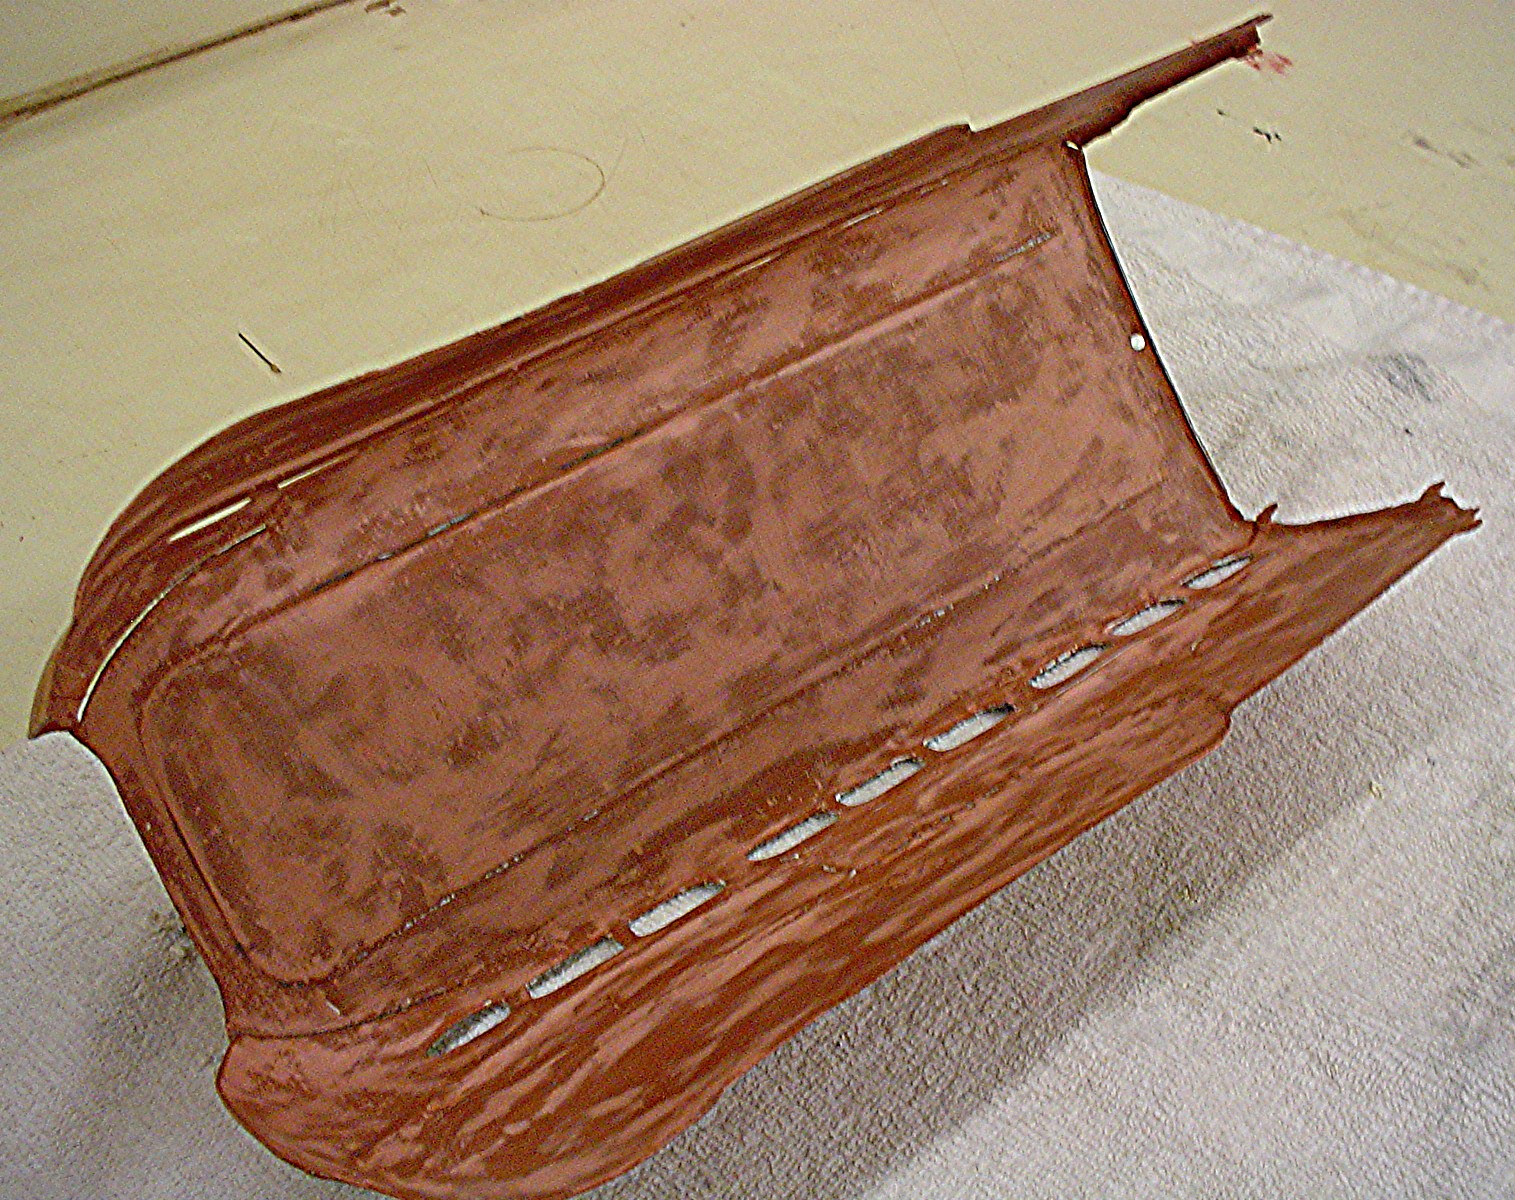 |
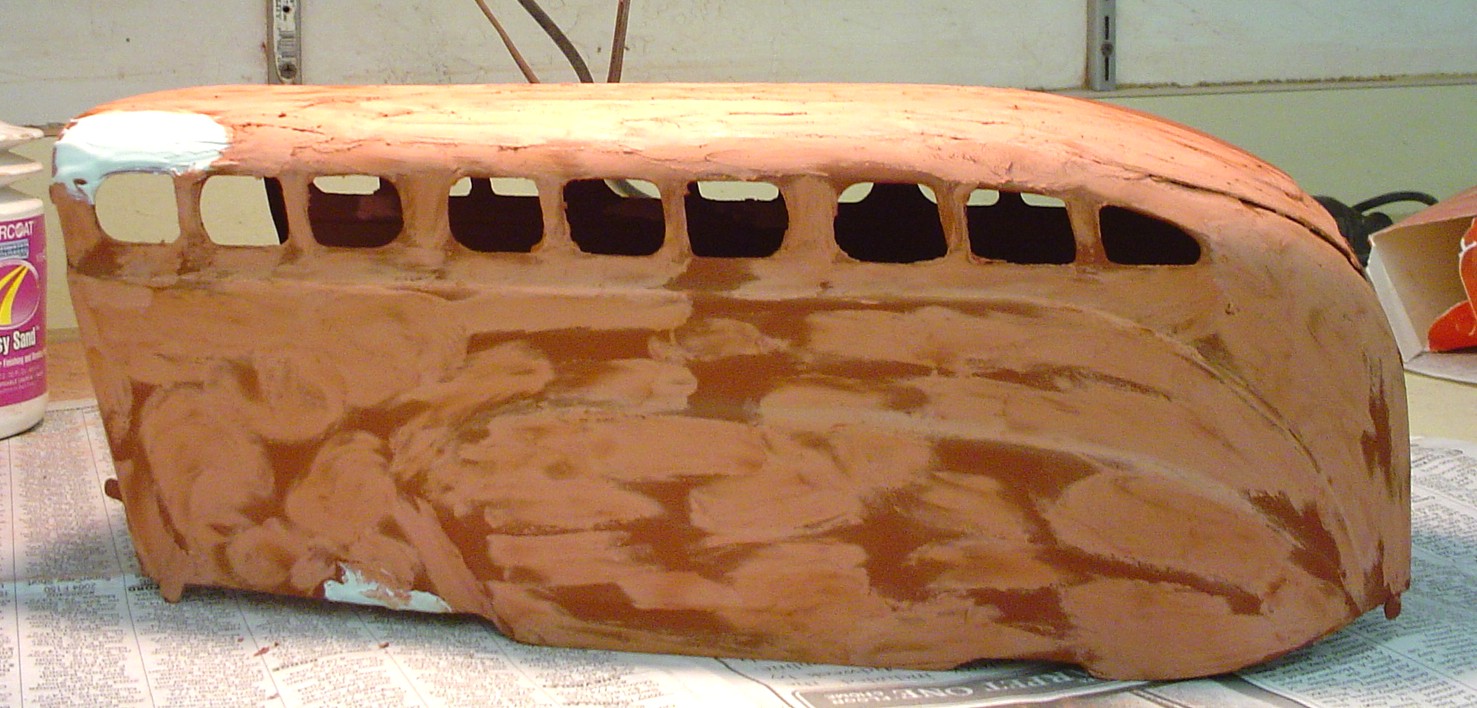
| Picture 8 – Once the inside was completed & all holes were filled & windows re-shaped, work begins on the exterior. This picture shows first round of bodyfiller prior to sanding. |
 |
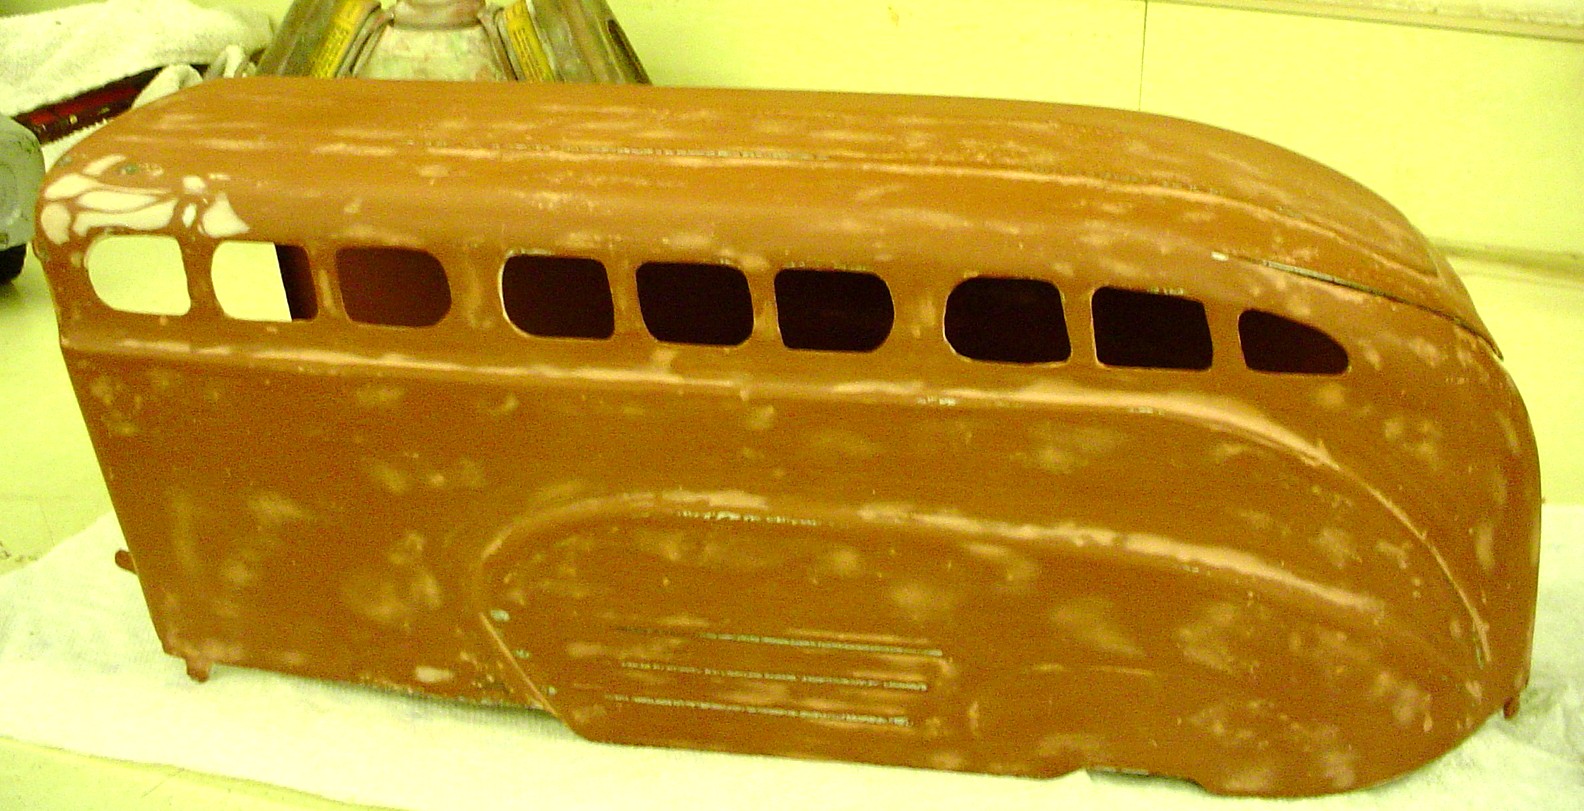
| Picture 9 – shows exterior after 2nd round of filler sanded off. |
 |
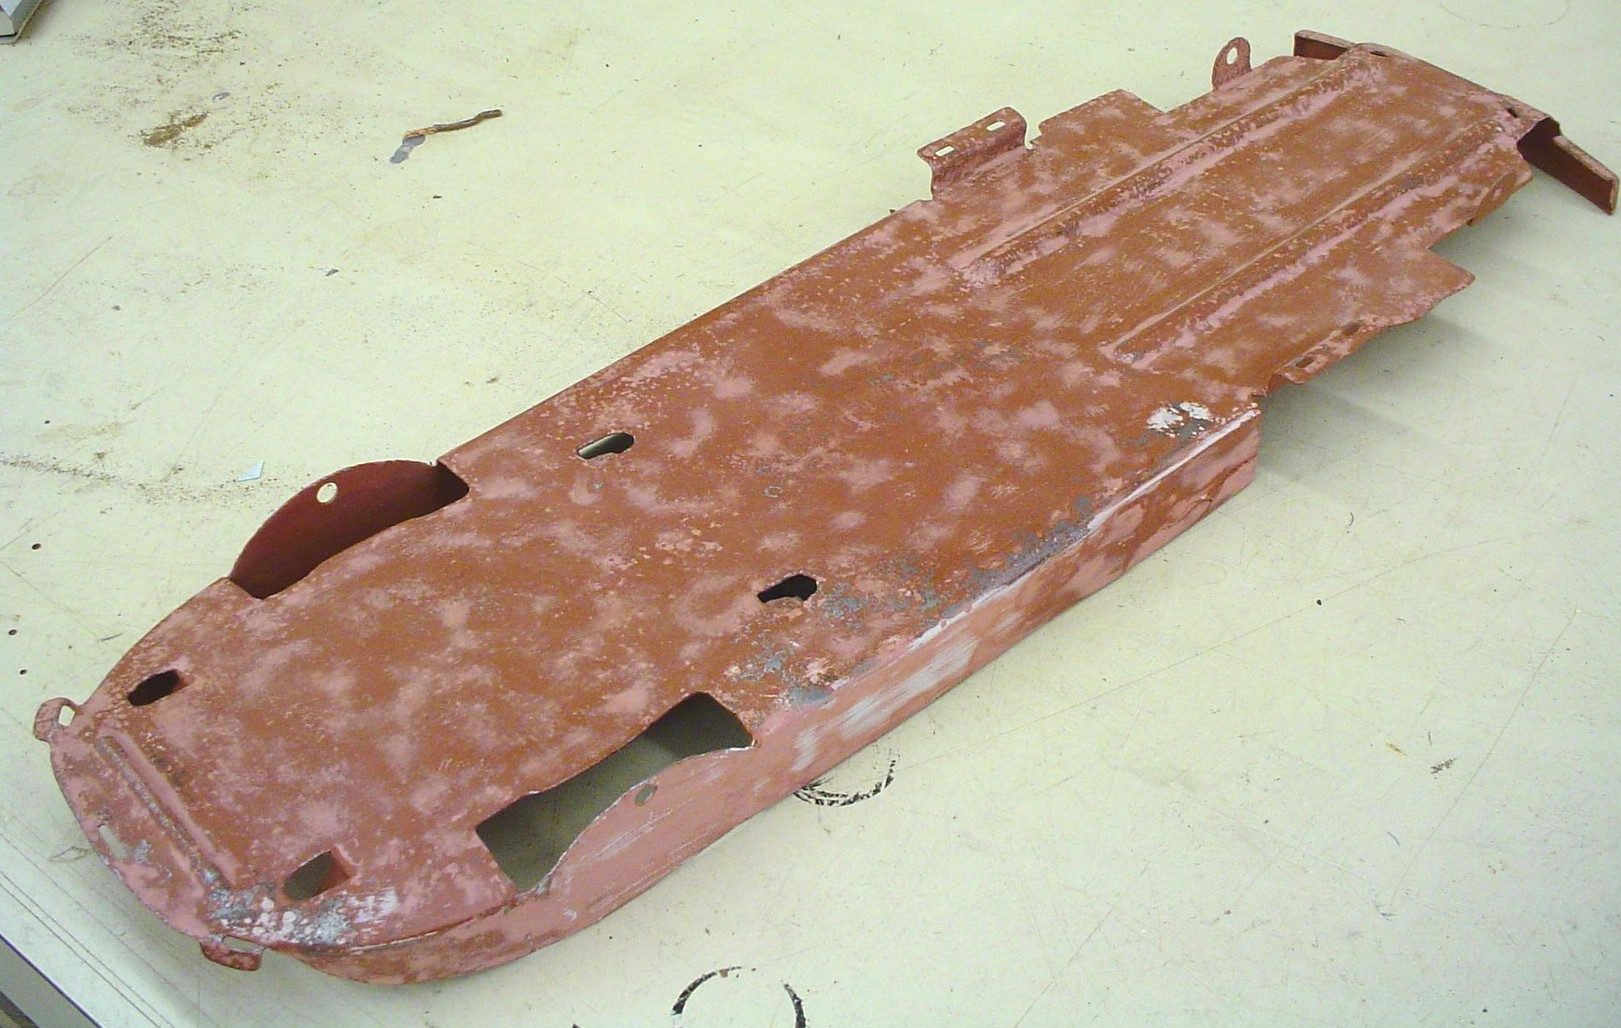
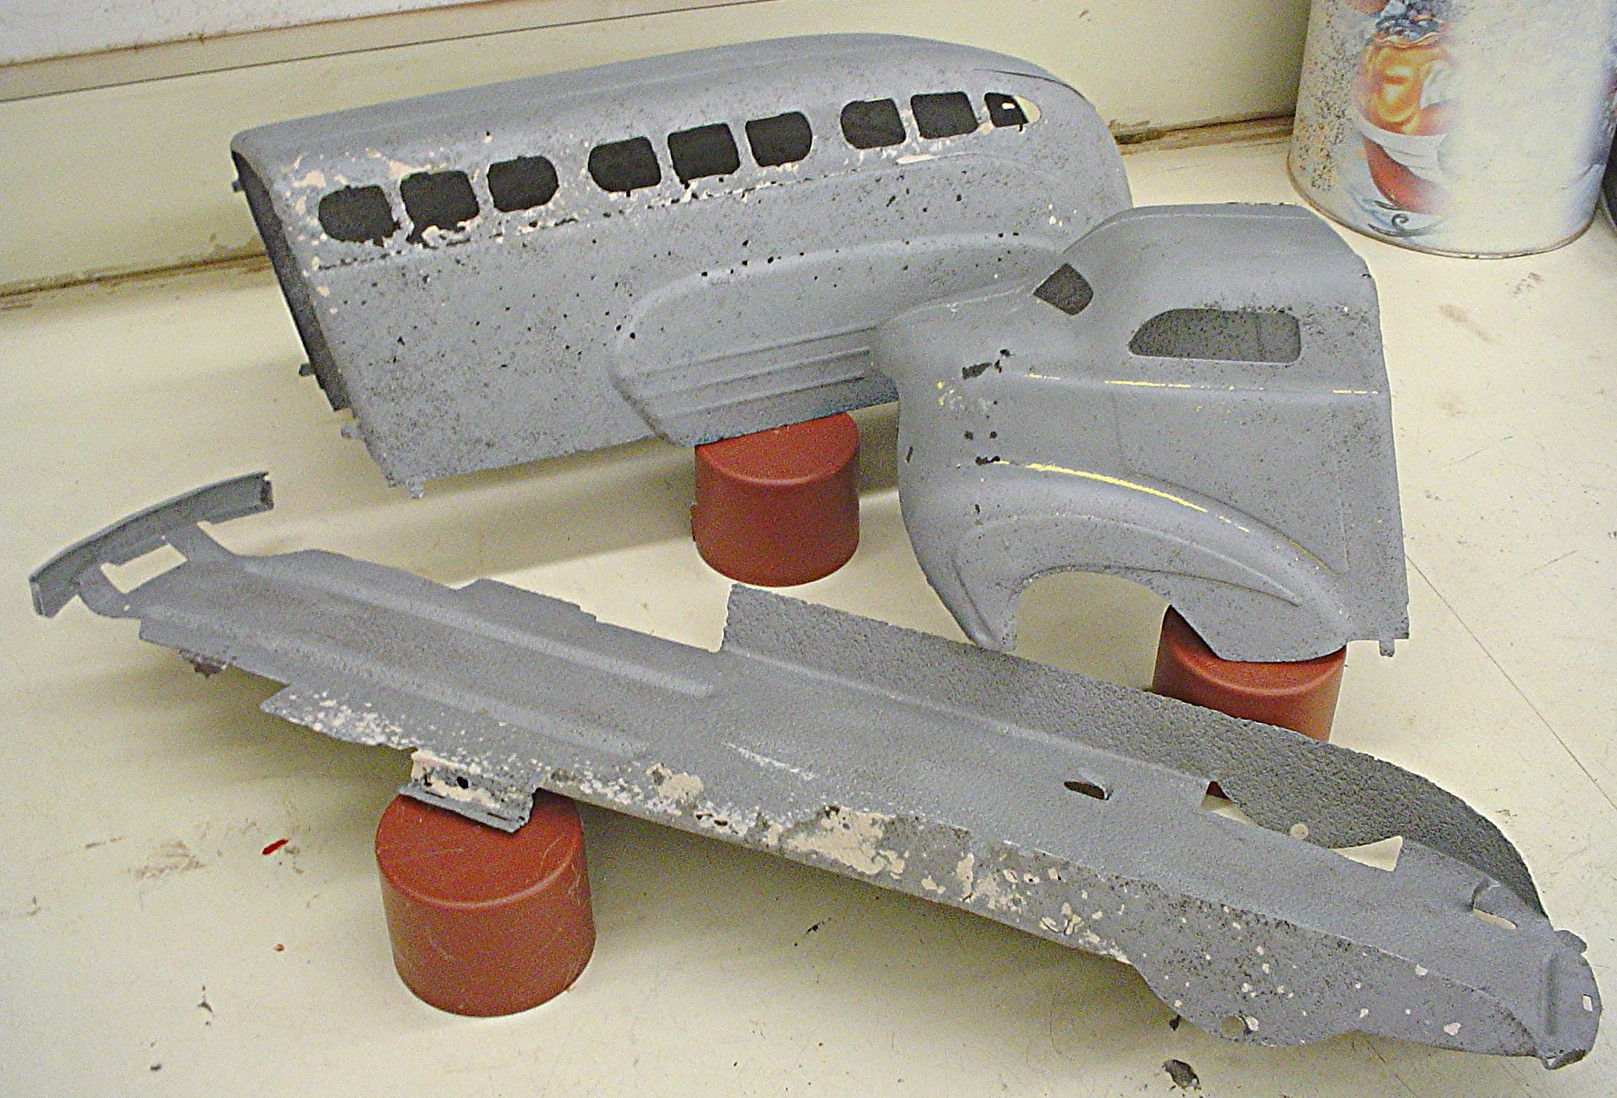
| Picture 10 – chassis after 1st round of filler applied & sanded smooth |
 |
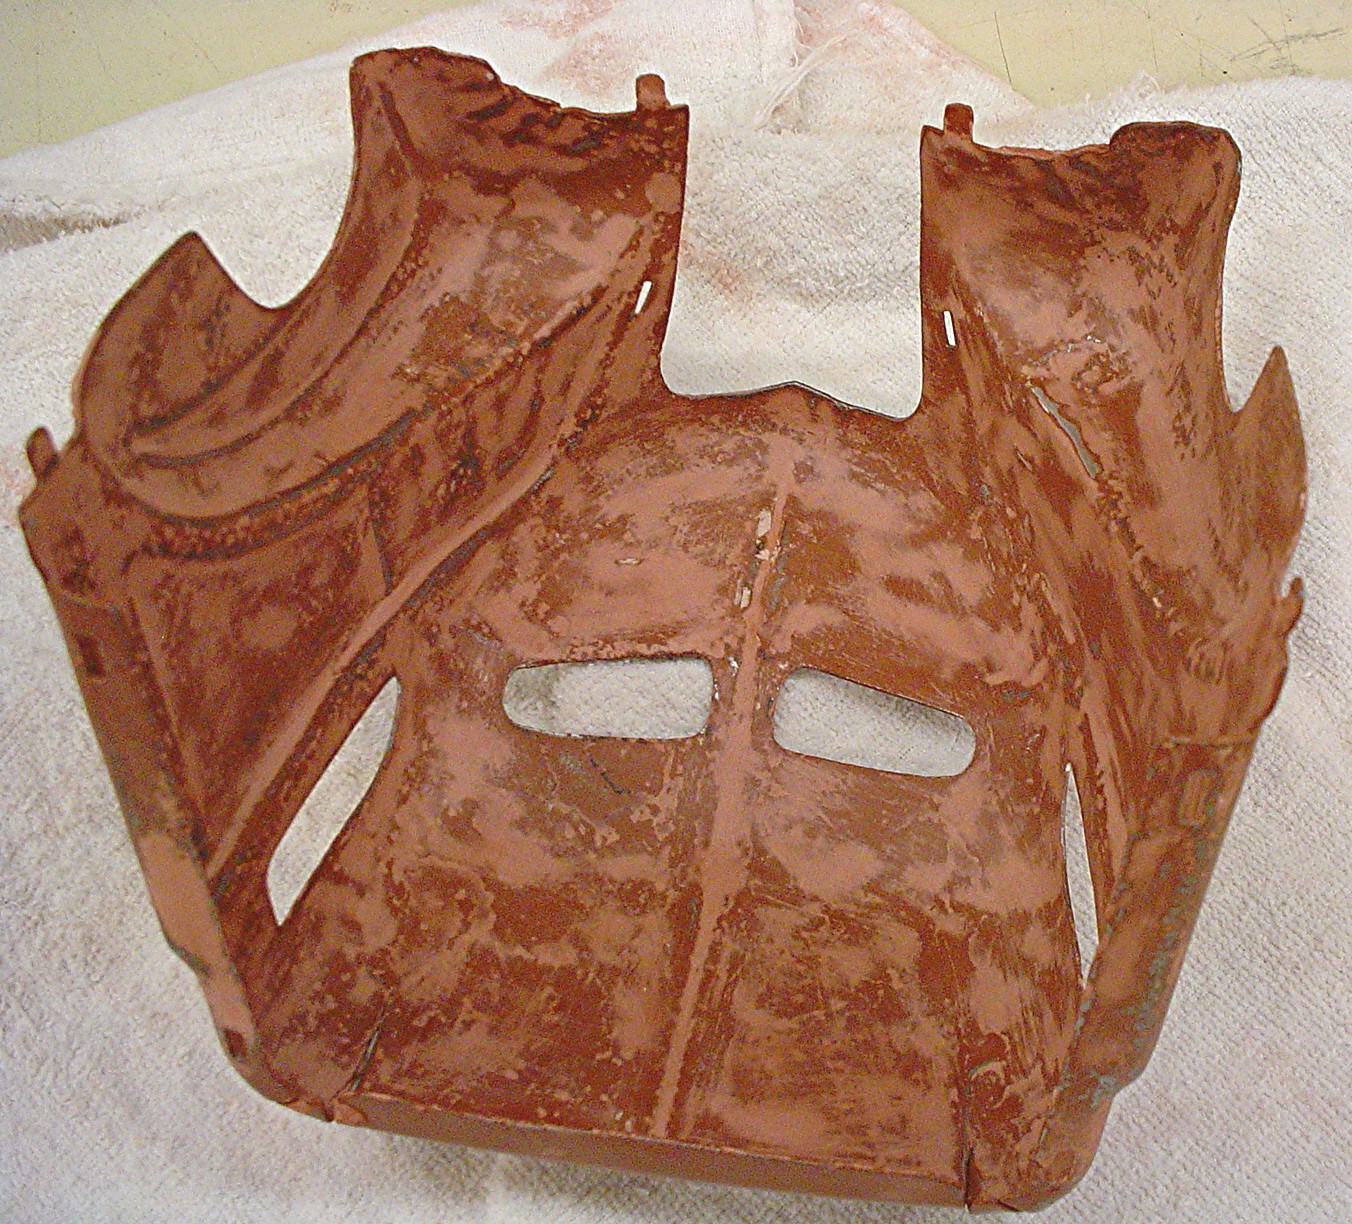
| Picture 11 – underside of cab after 1st round of filler applied & sanded smooth |
 |
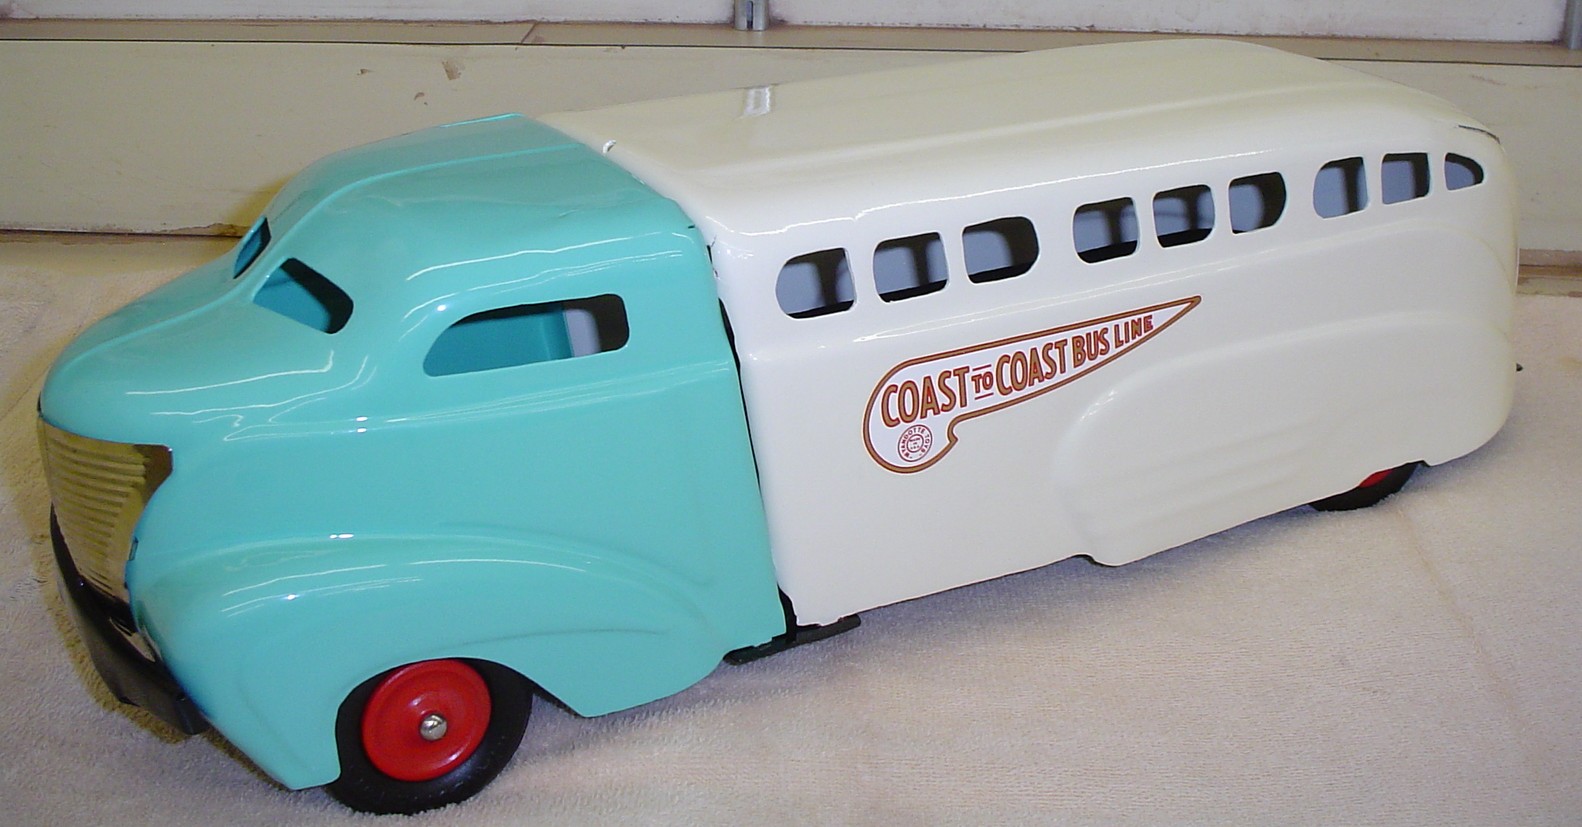
| Picture 12 – here’s the finished product! New grille, wheels, tires, decals & rear door. 4 different colors, all correct for this piece. |
 |
|
Proper restorations are very labor intensive & require a good working knowledge of the piece coupled with continued hands on work in order to achieve a finished product that closely reassembles a factory produced item of the period. If you’re considering a piece to purchase & the seller says “just a little paint & it’s as good as new”, run! Again, this one was a-typical, but I’ve tried to show what can be done to save even a basket case from the landfill. |
|
| Home | Company Info | Services Offered |
| How To Reach Me | List/Photos of Items Restored | Addt'l Services |
| Pricing | Anatomy of a Restoration | Collectibles Sites |
| For Sale |
Site Developed and Maintained By : Jimmy Tustin Last updated March 20, 2019
